How to Repair a Hanns-G HC194D Monitor
And other monitors in general
Updated July 14, 2022
Have a monitor that's making weird noises or won't turn on anymore? Assuming you don't have a baseball-bat sized hole in your monitor, you could be a victim of the capacitor plague, a problem with certain types of capacitors that causes them to fail prematurely. This guide is aimed at replacing capacitors in a Hanns-G HC194D monitor, but the general information here is applicable to repairing any type of monitor.
Order replacement parts
I have two HC194D monitors that both stopped working within a month of each other. A quick search online revealed that the problem could be bad capacitors, and disassembling the monitors visually confirmed it. Many of the capacitors on the power supply board were bulging or even had their vents blown open.
I ordered my replacement kits from a company called LCDalternatives through their eBay storefront. I recommend them for their quality capacitors and reasonable prices. Whatever your monitor's make and model, chances are they'll have a kit specifically for it.
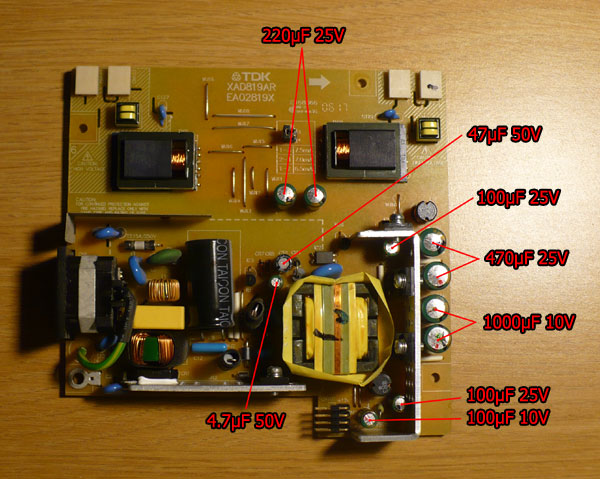
For the HC194D, you'll need the following 11 replacement capacitors:
- 1000 µF 10V (2x)
- 470 µF 25V (2x)
- 220 µF 25V (2x)
- 100 µF 25V (2x)
- 100 µF 10V
- 47 µF 50V
- 4.7 µF 50V
You'll also need standard tools, soldering equipment, and a fix-it mentality. Ready? Let's get started!
Open the monitor
1. Detach the plastic base, and lay the monitor face-down on your work surface.
2. Remove the four screws holding the mounting piece that the base was connected to. The mounting piece should now slide out from the monitor.
3. Remove the four screws holding the two halves of the monitor enclosure together. Use a flathead screwdriver to gently pry the two halves apart.
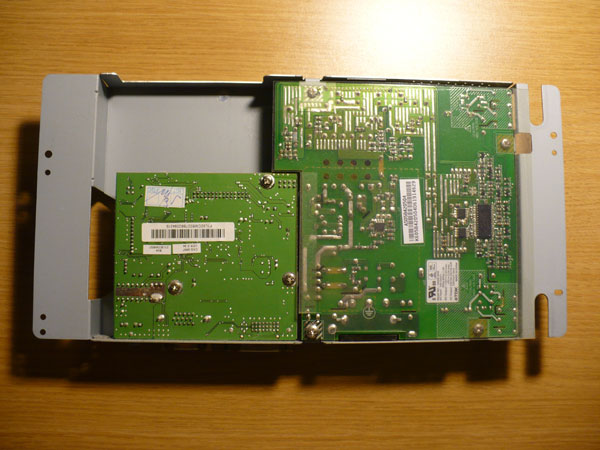
The inside of the monitor will look like this:
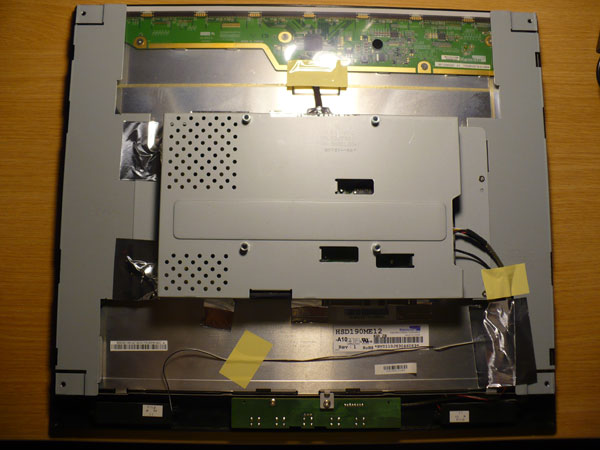
Remove the video/power supply assembly
4. Remove the tape and the four screws that attach the power supply assembly, which is the large box in the middle of the monitor assembly.
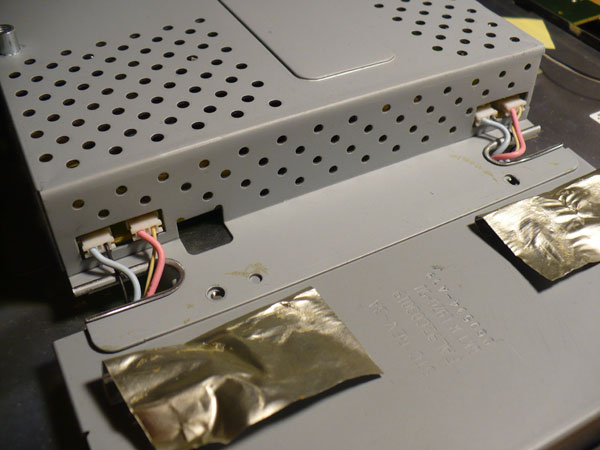
5. Unplug the four cables on the left side of the power supply/video assembly. Make a note of the ordering of the wire colors. The order differed ever so slightly even between my two HC194D's. They'll look something like this:
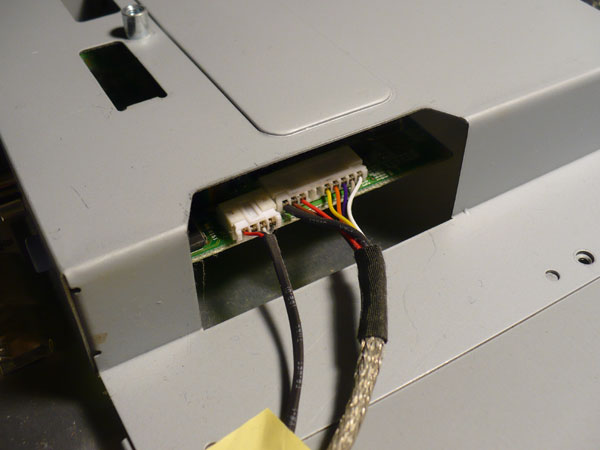
6. Unplug the two cables on the right side of the power supply/video assembly, again making note of the ordering of the wire colors. They'll look like this:
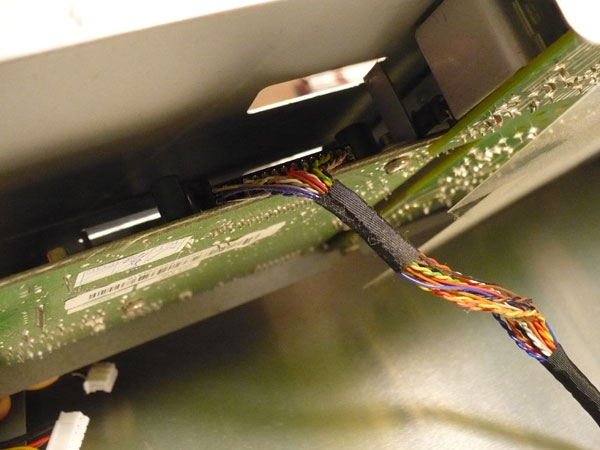
7. Now you'll be able to rotate the assembly upwards. Connected to the video board is one last cable that needs to be unplugged, looking like this:
Remove the power supply board
8. Now that the video/power supply assembly is free, turn it over and remove the three screws connecting the video board to the assembly, and the four screws connecting the power supply board. The assembly looks like this:
9. On the bottom of the assembly, remove the hexagonal screws flanking the VGA port and the DVI port.
10. Wiggle the video and power supply boards out of the assembly. Unplug the video board from the power supply board. The capacitors we'll want to replace are on the power supply board. I haven't had issues with the capacitors on the video board.
Replace the capacitors on the power supply board
11. Time to bust out the desoldering equipment. In addition to a soldering iron, it's helpful to have either a solder sucker or solder wick to remove the liquid solder during the desoldering process. Desolder the 11 capacitors (excluding the large black one, which probably doesn't need replacement) from the board.
Tip: If you're having trouble melting the solder holding the old capacitors, this might be because the board acts as a heatsink, drawing heat away from the solder. Try first heating the board on both sides with a hair dryer, which reduces the heat differential and helps concentrate more heat on the solder.
12. Insert the replacement capacitors into their correct locations, and make sure the polarities are oriented correctly. There is a "-" symbol on the board for each capacitor, indicating the direction of each negative lead. The capacitor locations for the HC194D are:
13. Solder the new capacitors to the board and clip the excess leads.
14. Now reinstall the power supply and video boards, and reassemble everything in the reverse order.
Test it out
If all is done correctly and the capacitors are truly the only things that needed replacement, your monitor should come back to life. If so, congratulations! I don't need to tell you of the benefits of resurrecting a dead monitor for $15 worth of capacitors over buying a new monitor for 10 times as much. Enjoy your good-as-new monitor!